

Workspace roles
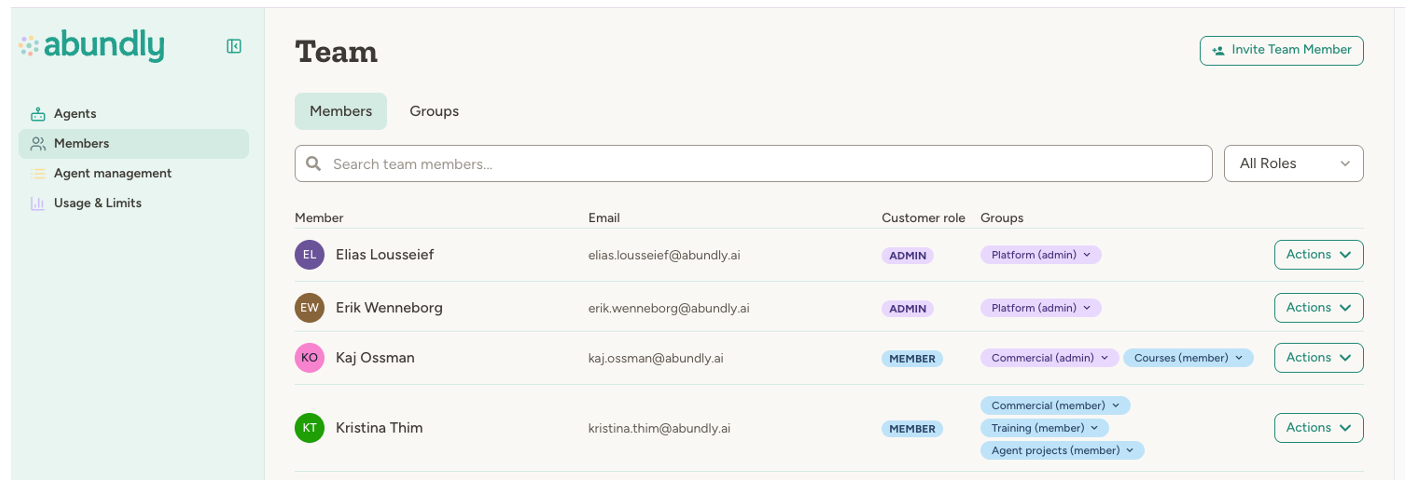
Every user in your workspace has one of four roles:
Use Collaborator for people who should use existing agents—chatting with them, being added to teams—without being able to create new ones. This is handy for onboarding new users through a guided setup agent before they get full access, or for anyone who should stick to using agents your admins or creators have already built.
Guests are not invited from this page — they join when someone grants them agent access by email from an agent’s User access tab. Guests are only visible to workspace admins in the members list, which also shows which agents each guest can access. Guests don’t count toward your plan’s member limit.
Inviting members
Admins can invite new members by clicking Invite Member at the top of the page.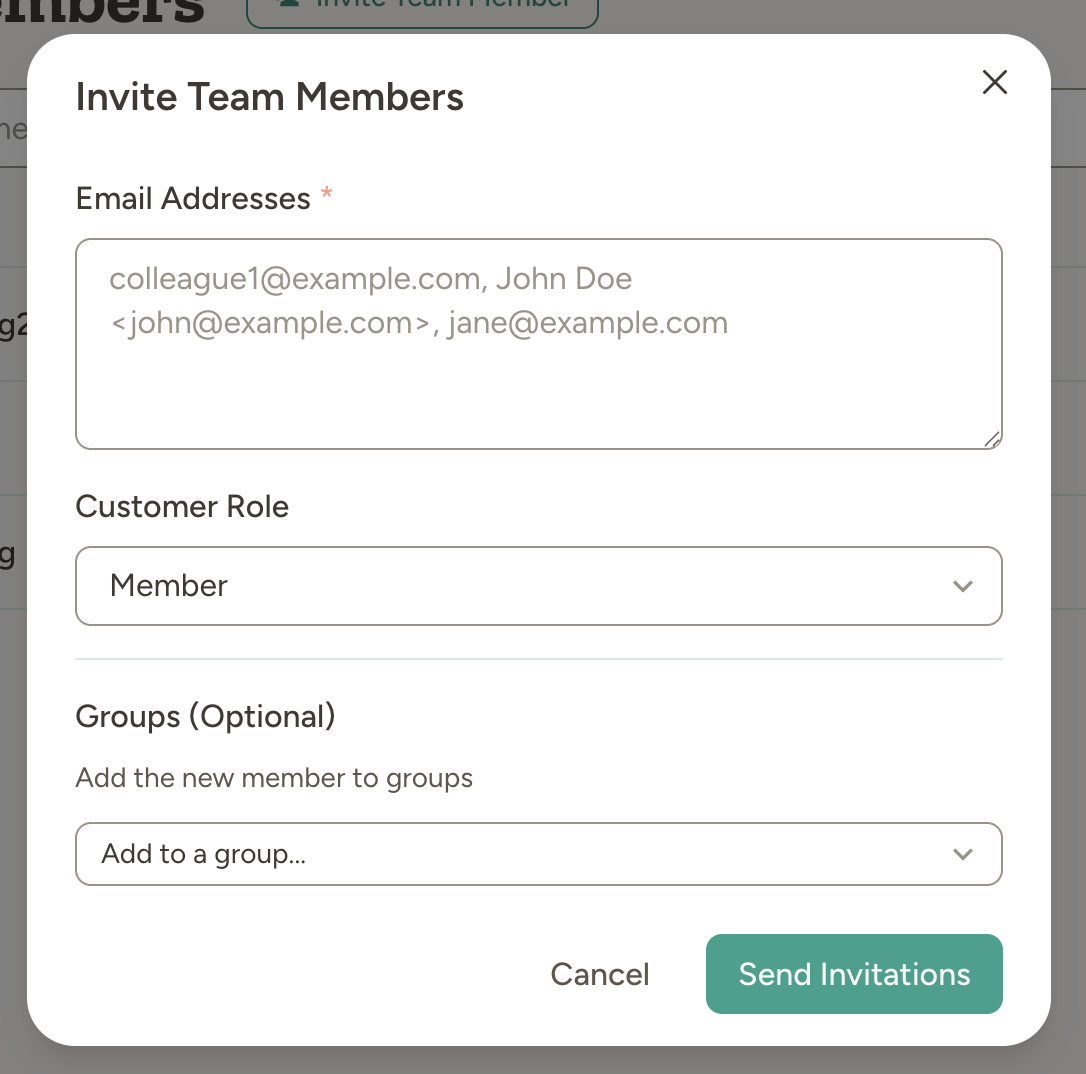
colleague@example.com) or include names (John Doe <john@example.com>). Separate multiple addresses with commas.
Select the role for all invitees—Admin, Creator, or Collaborator. If your workspace uses teams, you can also add invitees directly to specific teams.
Invitations are sent immediately. Each recipient gets an email with a link to join your workspace.
If your plan has a member cap, invitations count toward that cap before they are accepted. The limit is evaluated as:
- Active workspace members (guests excluded)
- Plus pending workspace invitations (guest invitations excluded)
Restrict access by email domain
Admins can limit which email domains are allowed in the workspace. Open Workspace → Settings → Login restrictions and enter a comma-separated list of allowed domains (for example,acme.com, acme.co.uk). Leave it empty to allow any domain.
When the list is set:
- Invitations to addresses outside the allowed domains are rejected.
- Single sign-on auto-join only adds people whose email is in an allowed domain.
- Members whose email is no longer in the allowed list lose access to the workspace until the list is updated or they sign in with a different address.
Managing members
Use the search box to find members by name or email. Filter by role using the dropdown to show only Admins, Creators, or Collaborators. Admins can change a member’s role or remove them from the workspace using the Actions menu on each row. Each row also shows the member’s last login and last activity timestamps so you can see at a glance who is engaged and who hasn’t started using their seat.Every workspace must have at least one Admin. You can’t demote or remove the last Admin—promote another member first.
Leaving a workspace
Any member can leave a workspace they belong to by clicking Leave workspace in the page header and confirming. You immediately lose access to the workspace and all its teams, but your Abundly account and other workspace memberships are unaffected.If you are the only Admin in the workspace, the button is disabled. Promote another member to Admin first, then leave.
Deleting your account
Leaving a workspace only removes you from that workspace. If you want to remove yourself from Abundly entirely, you can delete your own account from Profile settings → Danger Zone → Delete my account. A brief optional feedback form will appear — select your reasons for leaving and optionally add a note. This is voluntary and can be skipped. TypeDELETE ME to confirm.
Deletion uses a 30-day grace period:
- Your account is immediately signed out and login is blocked, with a message directing you to support.
- Workspaces where you are the only member are deleted together with your account, and their agents stop right away. The confirmation dialog lists these workspaces before you delete.
- You get a confirmation email with the date your account will be permanently deleted.
- If you change your mind during the 30 days, contact support@abundly.ai to reinstate the account. Workspaces deleted with it are restored too.
- After 30 days, your account and all associated data — including those workspaces — are permanently removed. If you’d rather not wait, ask support@abundly.ai to erase everything straight away.
- You can’t register a new account with the same email address while a deletion is pending.
Any active paid subscriptions on workspaces you own are automatically cancelled at the start of the deletion process, so you won’t be charged after deleting your account.
Notifications
Each user has a bell icon next to their avatar in the top-right corner of the portal. The bell shows an unread count and opens a panel listing recent notifications such as agent approval requests, low-credit warnings, and trigger problems — for example a trigger that failed to run, was blocked by your plan limits, or was stopped by an attack-detection check. Notifications are personal — what you see depends on the agents you own and your workspace role. Agents can also send a notice to their owners when they need a human — when they’re blocked, need a decision, or want to propose a change they can’t make themselves, such as an update to their own instructions. This is most useful when an agent is working on its own, with nobody watching. Every notice an agent has sent is listed under Activity → Owner notices on that agent, where owners can read it in full and start a chat with the agent about it, so the agent can act on whatever you decide. Workspace and team admins can send notices to agent owners too, from the bulk actions on the Agent Management page. These appear in the same place, marked as coming from an admin rather than from the agent, and have no category toggle — an owner always hears from their admins. You can choose which categories you receive — and whether to also get them by email — from Profile settings → Notifications. In-app delivery is always on for the categories you keep enabled; email is on by default and can be turned off with a single switch, or via the opt-out link in any notification email. The checkbox at the top of the card turns all notifications off at once, including notification types added later — turning categories off one by one leaves future types on. Workspace and team admins can also configure notification categories at the agent, team, and workspace level. Open the Notifications card in agent settings, team settings, or workspace settings to control which notification types are enabled for that entity — for example, disable credit alerts on a specific agent while keeping them on for others.Some notifications escalate when an agent has no owner — for example, a tool-approval request will be sent to team admins, and then to workspace admins, if no owner is configured.
Pending invitations
Below the members list, you’ll see any invitations that haven’t been accepted yet. Each shows the email address, assigned role, and invitation status.
Support role
If you’ve granted Abundly support staff temporary access to help troubleshoot an issue, this section shows who holds the support role, which agents they can reach, and when it expires. You can revoke it at any time.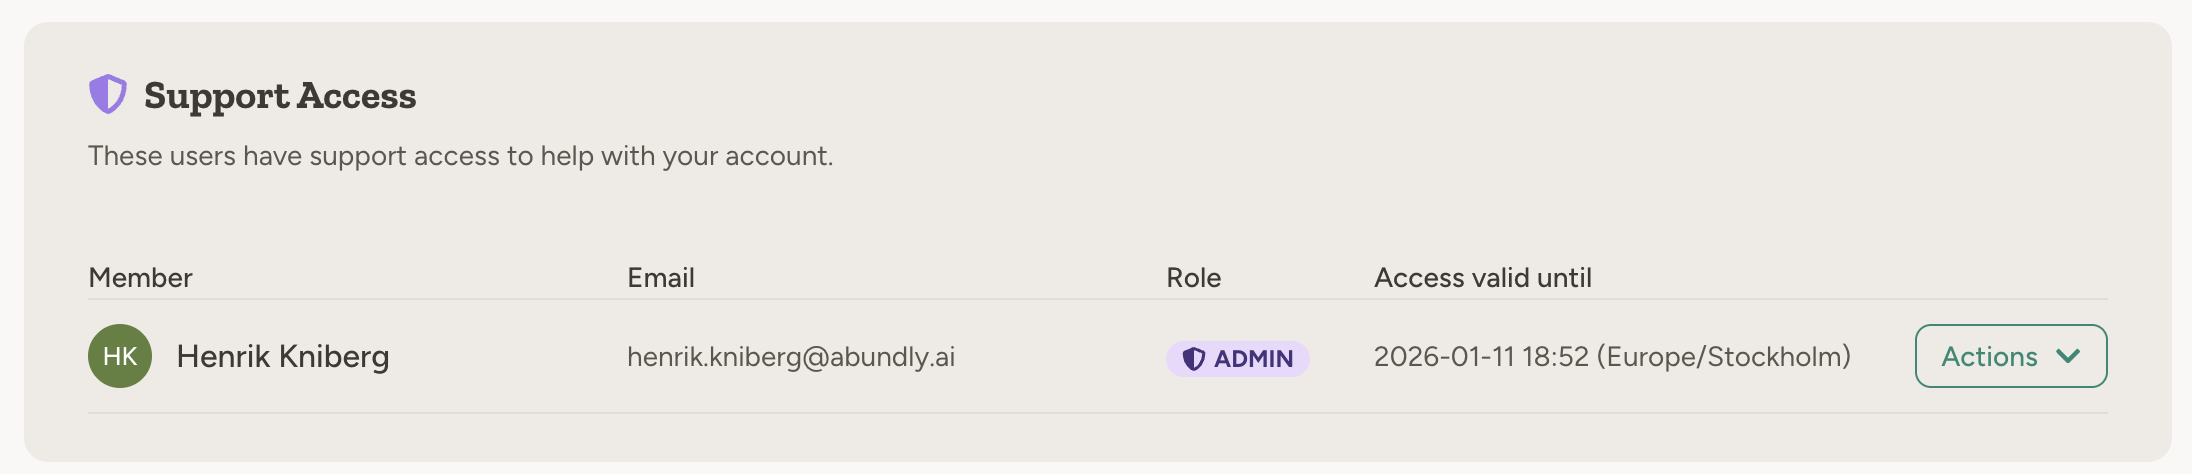
Working with teams
For larger workspaces, teams let you organize members by department or function. When teams are enabled, you’ll see a Teams tab next to the members list. Teams add a layer of organization:- Agents can belong to a team
- Members must be in that team to access those agents
- Team admins can manage members within their team
Teams are an enterprise feature. Contact support@abundly.ai to enable them.
FAQ
What happens when I remove someone from the workspace?
What happens when I remove someone from the workspace?
They immediately lose access to all agents and data. Their past conversations and actions remain in the logs for audit purposes. Removing someone from the workspace doesn’t delete their Abundly account—they simply no longer have access to your workspace.
Who can invite new members?
Who can invite new members?
Admins can invite anyone from the Members page. If your workspace uses teams, team admins can also invite new people directly into their team—with a workspace role no higher than their own. Only Admins can change roles or remove people from the workspace.
What's the difference between Guest and Member?
What's the difference between Guest and Member?
Creators and Collaborators have default access to workspace agents (based on each agent’s user access settings). Guests have no default access—they can only see agents they’ve been explicitly invited to. Use Guest for external collaborators who should only access specific agents. Guests are invited from an agent’s User access tab and don’t count toward your plan’s member limit.
What's the difference between Creator and Collaborator?
What's the difference between Creator and Collaborator?
Both can use agents the same way—chat, join teams, see the members list. Only Creators can create, clone, or import agents, and manage workspace secrets and outgoing APIs. Use Collaborator when someone should stick to using agents that already exist.
Learn more
Access Control
How roles and permissions work in detail
Teams
Organize members by department or function
Agent Management
Centralized control over agents and capabilities