How to enable
Before you can connect, an Atlassian organization admin must allow Abundly to access your Atlassian instance. After that, each user authenticates with their own Atlassian account.Allow Abundly in your Atlassian admin console
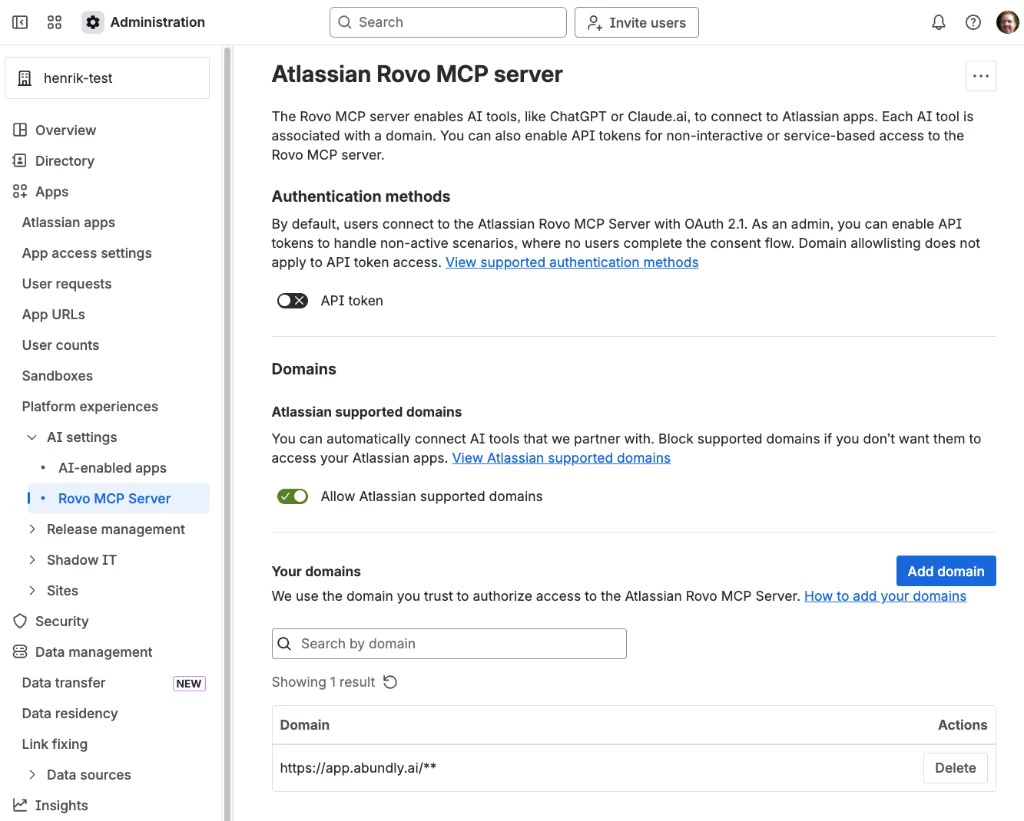
- Go to admin.atlassian.com
- In the sidebar, navigate to Apps → Platform experiences → AI settings → Rovo MCP Server
- Click Add domain and enter your Abundly app domain with
/**(for example,https://app.abundly.ai/**orhttps://your-tenant.app.abundly.ai/**)
Add Atlassian to your agent
Go to the MCP Servers tab in your agent’s capabilities. You’ll find Atlassian in the “Add a server” section — click it to add.
Example use cases
- Issue triage — “Every morning, check Jira for new unassigned issues in the Support project and suggest an assignee based on workload”
- Sprint reporting — “Summarize the current sprint progress and post an update to Slack every Friday”
- Documentation sync — “When a Jira epic is marked as done, create a Confluence page documenting what was shipped”
- Cross-platform updates — “When someone mentions a Jira ticket in Slack, look it up and post a summary with the current status”